For a host, managing, advertising, and selling their accommodation is not an easy task. Most likely, you already showcase your property on one or more short-term rental channels – that’s the first step.
The second step is to systematically advertise your accommodation to maximize bookings and revenue. You can do this in many ways, on social media, through a blogger or influencer.
However, the most crucial tool for advertising is to have your own website. A website from which you can accept direct bookings, promote your accommodation, provide more information about all the amenities you offer to interested travelers, strengthen your brand, and attract new potential customers.
Why should you have your own website?
One of the significant challenges for someone entering the short-term rental market is how to stand out and differentiate from others. Aside from the fact that creating your website requires a bit more work, it is undoubtedly the best way to promote your accommodation.
Some of the advantages of having your website are:
- It is ideal for both those renting one and those renting multiple accommodations. Whether you have a large house with many rooms or multiple rooms in different houses or various vacation rentals – your website allows you to promote them in the best possible way.
- With the website, you will attract new travelers, build your brand and reputation, giving interested visitors a more comprehensive experience and communicating with them directly.
- You can control and adjust your marketing strategy. You can have your blog, send direct emails to travelers, use social media, or have your SEO strategy to appear higher in search results.
- You will avoid channel fees. The cost is higher if you promote your accommodation on multiple channels due to the commissions each one charges. You will save extra money simply by not paying a commission every time you receive a new booking.
- You will have the opportunity to build your brand. You can differentiate yourself from others with your logo, style, photos, and much more.
Detailed guide on how to create your own website
Below, you will see step-by-step every stage to create your fully functional website to accept direct bookings.
Attention: For this guide, we use SiteGround as the hosting provider, Stripe for payments, Motopress to accept bookings, and the Palmeria theme. You are free to use any others you prefer. Neither Hosthub nor the creators of the guide receive any commission to advertise the above services.
Are you ready?
Before we get into the details, see a list of the steps you need to follow:
- Open an account with a hosting provider
- Buy your own domain name
- Get Managed WordPress Hosting
- Download a theme for accommodation rentals
- Open a payment account to accept card payments
- Activate the reservation system
- Upload your accommodations
- Set your prices
- Add payment methods
- Add content to your website
- Sync your website with your other channels to avoid duplication
- Add reviews to your website
Let’s start building the website!
Step 1: Open an account with SiteGround (or any other hosting provider you desire)
The first step is crucial; you need to create your domain name and connect it to your site.
- Go to https://siteground.com/wordpress-hosting.htm.
- Select the StartUp package..
- On the next page, you can buy a domain or use one you already have.
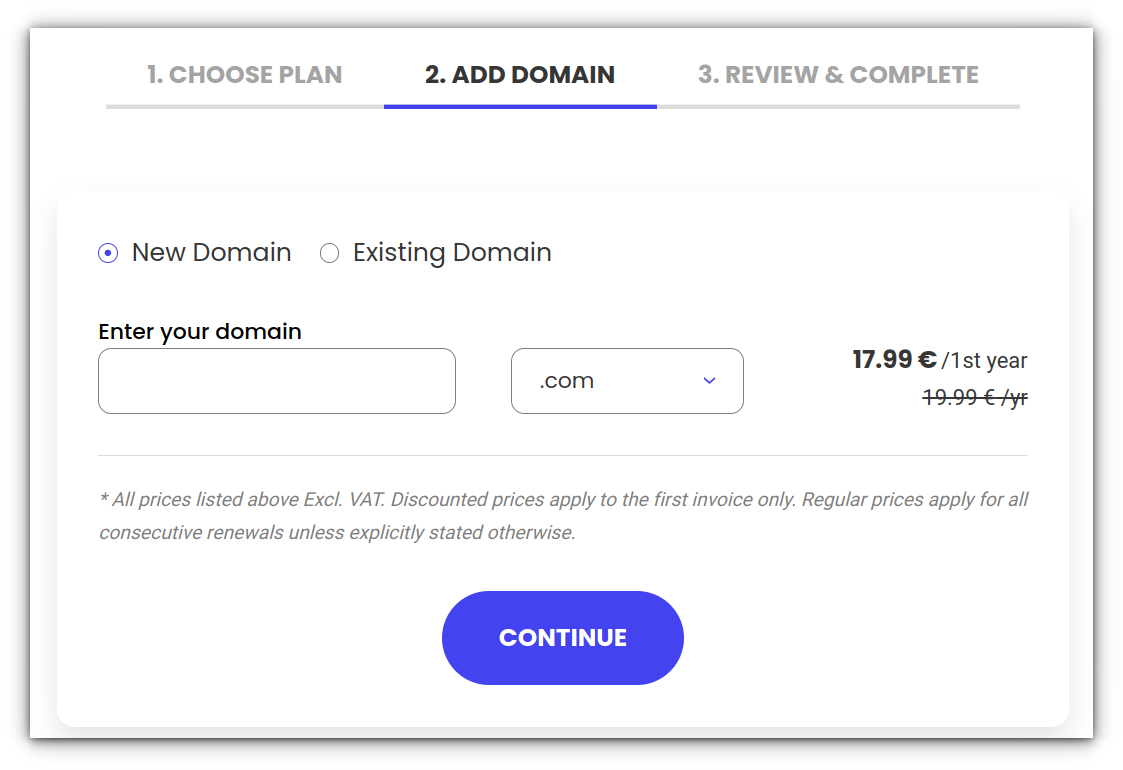
Step 2: Buy your domain
There are a few things to consider before buying your domain. Below, you will find some tips on how to choose it:
- Choose a name that sets you apart from others in the market. It should be as unique as possible, and avoid generic names.
- Your domain name should not be your property’s name.
- Your domain name should represent your brand. Stay consistent with it!
- Use a domain that includes your brand name and is easy to spell.
- Use keywords in your domain name. For example, ‘’NewYorkSkyHighApartement’’ vs. ‘’Apartment James’’
See below how to buy your domain:
- In the next step, you will be asked to choose a Domain (a new one or one you already have).
Step 3: Get Managed WordPress Hosting from SiteGround
Now is the point where you will realize how easy it is to create your site.
With one click, you can create your site without the intervention of a professional. WordPress is a cost-effective and user-friendly website that will help you create your site very quickly. Whether you have a small hotel or just a room, WordPress will work just as well.
Managed WordPress is an optimized hosting platform on SiteGround that helps you:
- Securely operate WordPress
- Manage basic tasks such as installation, backup creation, etc.
- Have everything on one platform
In summary, a managed WordPress will do all the hard work for you. You don’t need to be a tech expert to create your own functional site.
- In the next step, fill in all the required information and proceed to payment
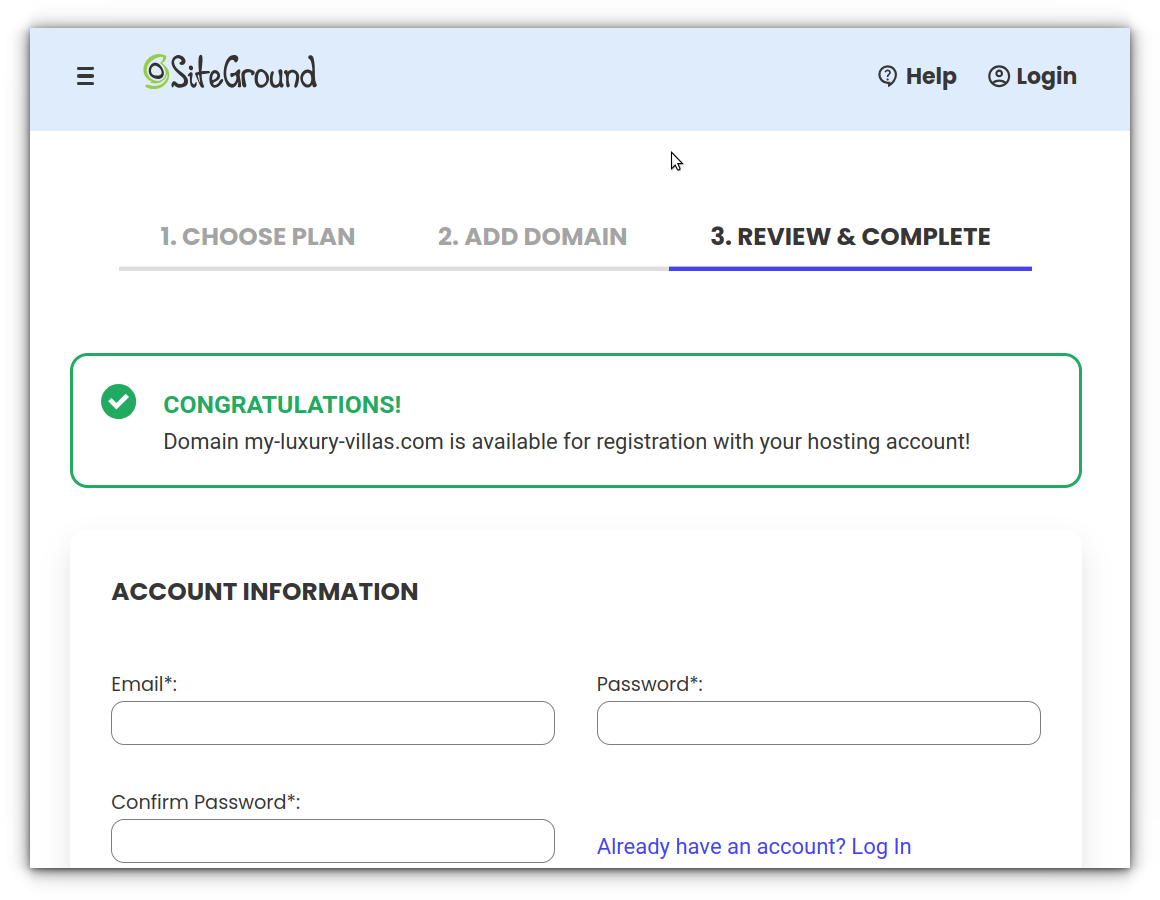
Next, leave the SiteGround site for a while and move on to the next step.
Step 4: Purchase the Motopress plugin and download the Palmeria theme
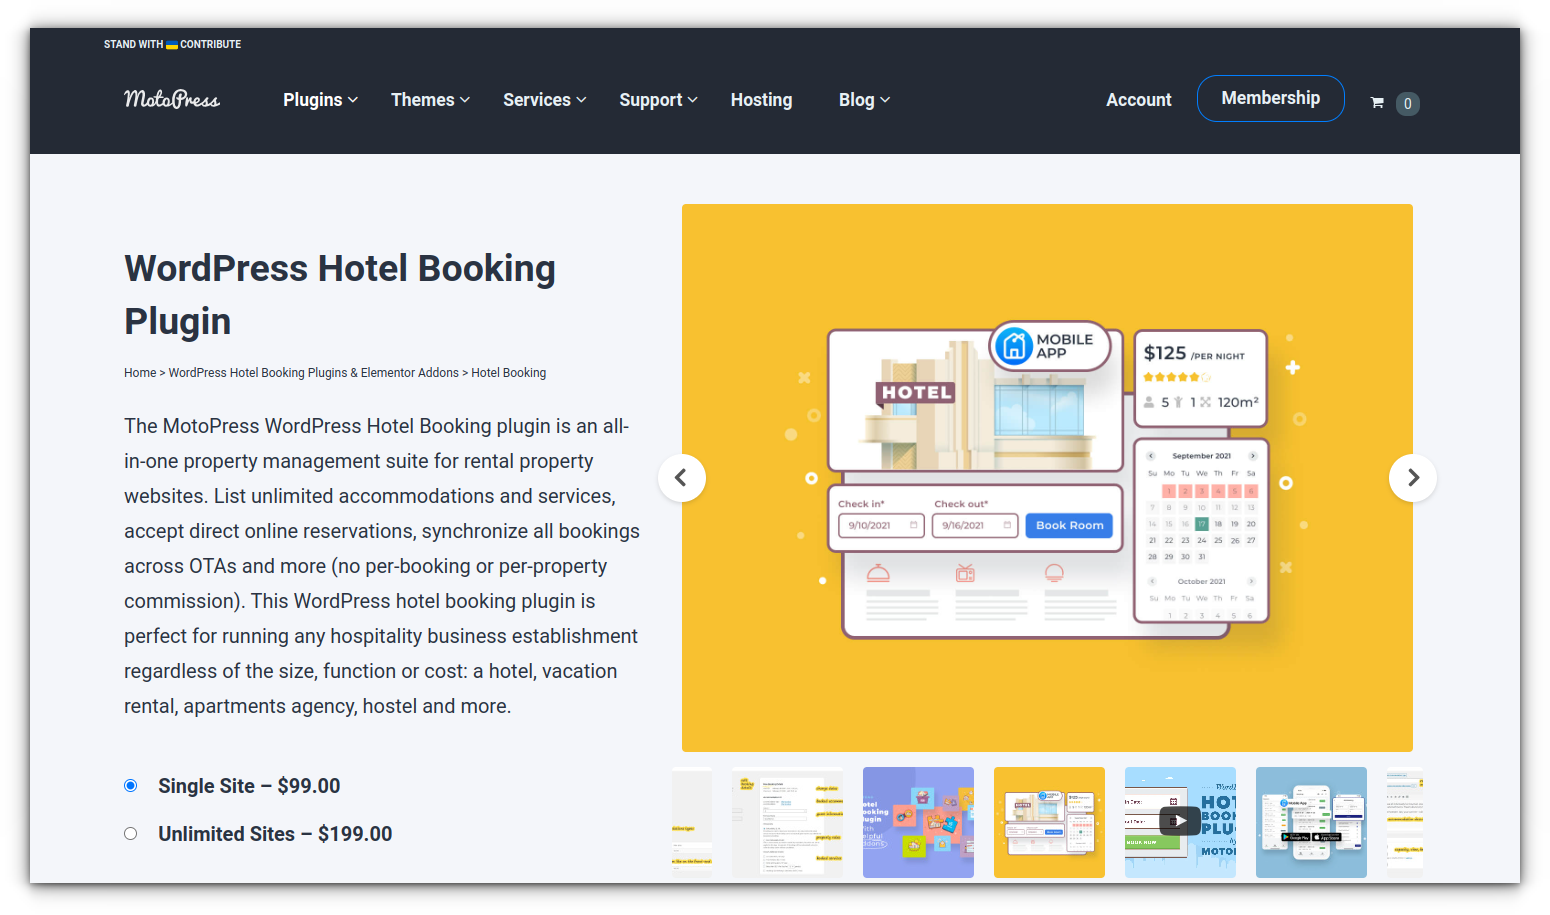
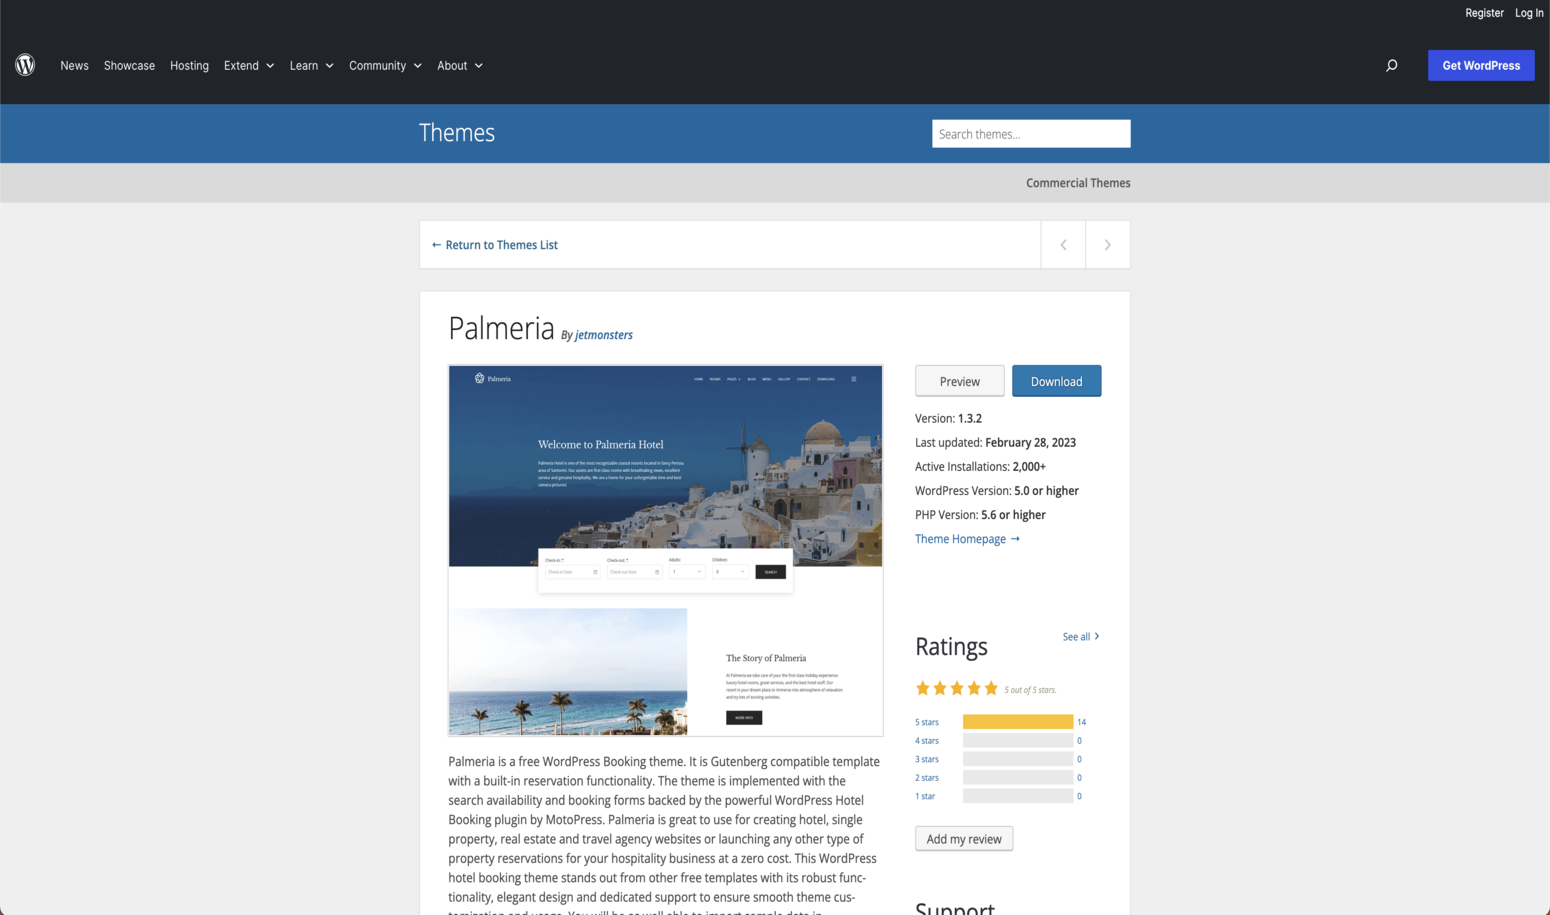
Here are the steps to download the Palmeria theme:
- Go to Link
- Select ‘’Download’’
- If you want to learn more, you will find information and the Preview option that will help you see how the theme will look on your website
Next, you need to install the downloaded theme:
- Once completed, navigate to your computer’s Downloads. There, you will find the downloaded theme
- Then, go to your Siteground account, select ‘’Site Tools’’, click on ‘’Install and Manage WordPress’’, and finally click on ‘’Log in to Admin Panel’’ under the “Actions” options
- This will redirect you to the WordPress dashboard. This is the first time you encounter the dashboard where your website will be easily created
- Once in the dashboard, select Appearance and then Themes
- Click on Add New, to display the Theme Directory
- Choose Upload Theme
- Find the .zip file of the downloaded theme and choose ‘’Upload Theme’’
- Once it loads, select Install Now
- The last step is to activate the theme, ‘’Activate Theme’’, and you’re ready!
If you encounter difficulties in the above process and want our experts to create your website based on your needs, click below!
Step 5: Open Stripe to accept card payments
In this step, we need to ensure that not only will you create a website, but it will also be fully functional, and at the end of this guide, you will be ready to accept your first reservations. To achieve this, you will use Stripe. Stripe is a platform that allows you to send and receive reservations over the internet.
Below are the steps on how to open an account on Stripe:
1. Go to Stripe & create an account

2. Visit the Stripe registration form
3. Choose the country where your bank is located
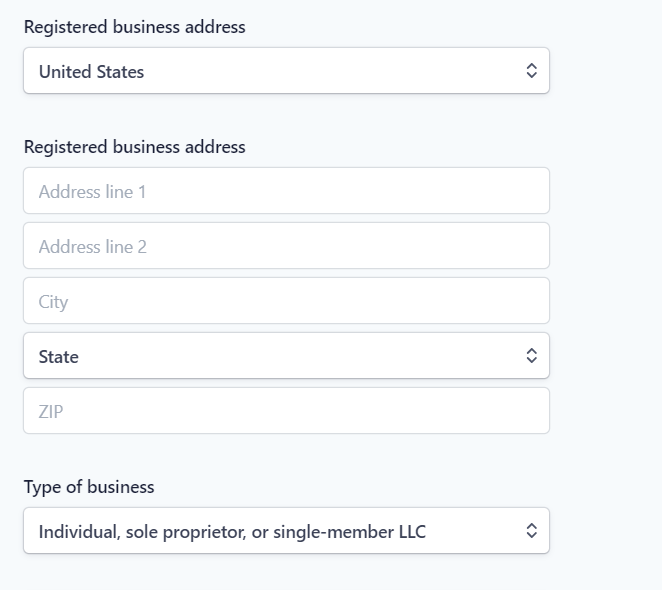
4. Log in to your account and fill in the following information:
a. Account information
b. Social Security Number
c. Address
d. Your credit card
5. Once logged in, select ‘’Activate Account’’ at the top left of the screen. This will activate your account.
6. You need to ensure that you have activated all API Keys. Select Account -> Account Settings -> API Keys
7. Copy the Live Secret Key and Live Publishable Key and make sure they are stored
Step 6: Activate the Motopress Plugin
The plugin is already installed; all you need to do is go to Plugins and select Activate Plugin.
Below, we will explore all the features of the Motopress plugin.
Step 7: Add Your Accommodations
It’s time to list your first property! Before you begin, make sure you have the following ready:
- A large image of the accommodation (hero image), professionally showcasing the property
- A description of the accommodation. Some elements that can help you:
- A brief summary highlighting the key features of the accommodation
- An engaging title
- Include room numbers, amenities, services, and information about the surrounding area
- Add any events or activities nearby
For a more detailed guide on writing the perfect description, you can find it here.
Once you have prepared all of the above, you can list your accommodation.
- Select Accommodation -> Add New
- Add your engaging title in the “Title section“
- Add your description
- Select Add Media to insert photos of the accommodation
- On the right, you will find the option Set Featured Image. This should be the large image mentioned earlier (hero image)
- You can then start filling in the information in Accommodation Settings:
- Enter the number of accommodations (this is mandatory)
- The normal capacity of the accommodation
- The maximum number of people allowed in your property
- The minimum number (optional)
7. Once you’ve prepared these, select Publish. If you want to see how the information looks on your website, click Preview
What happens if you change the price depending on the number of guests?
- Use the ‘number of occupancies’ option to specify the number of guests for whom you want to set the base price.
- Select Accommodation ⇝ Rates and set the filter ‘Price per adult above normal occupancy.’
Would you like our experts to create your website in just a few minutes?
Step 8: Create Your Accommodation Listings in the Motopress Plugin
We will start with the invoicing settings. There are many options in this section. Before we learn how to set the seasons and their prices, we will guide you on what seasonal prices are and why it is important to set them.
What are seasonal prices?
Seasonal prices are basically a deviation from the typical prices for specific periods of the year or events. You can adjust your seasonal prices based on:
- Summer months if your property is seaside
- Winter holidays if your property is located in a ski resort
- Any popular local event that you know will attract a large crowd
Why set seasonal prices?
Setting seasonal prices is essential for every accommodation owner. Keeping prices the same won’t make it easy to increase your income, as you won’t capitalize on increased demand.
How to know what seasonal prices to set?
Knowing what prices to set is not easy and involves many pitfalls.
- Before changing your prices, check your competitors’ prices
- Conduct a small study to see the prices of similar accommodations to yours
How to set seasonal charges?
- First, you need to determine the projected revenue for a specific period
- Based on this, find out what your charges should be for a healthy increase or decrease in prices
Seasons
- Choose Accommodation ⇝ Seasons
- Initially, you need to set the seasons. Choose the seasons that suit you according to festivals, events, weekends, high or low demand days
- Set the start and end dates for each season
- The end date should be equal to the maximum reservation date
Booking rules
Choose Dashboard -> Booking rules. These are optional but will help you optimize your bookings as much as possible. You have 5 types of booking rules:
- Check-in days: When guests are allowed to check-in
- Check-out days: When guests are allowed to check-out
- Minimum stay days (minimum stay)
- Advanced reservation rules: If you have mandatory rules for special prices / discounts / coupons
* Be flexible with the rules you set. Make sure to offer flexible check-in and check-out days and times. Some guests may never see your property if you have strict booking rules.
Prices
Choose Accommodation ⇝ Rates
- This should happen after defining the type and seasons of the accommodation.
- Here you can choose:
- Adults / Children prices above normal capacity.
- Any special prices you have for specific guests and seasons.
- Discounts (when search criteria meet the discount rule you have set).
- Coupons
Charges and Taxes
Choose Bookings ⇝ Taxes & Fees.
- Both fees and taxes will be mandatory and added on top of each reservation.
- They can either be a fixed amount or a percentage.
These can apply to:
- Accommodation prices.
- Additional service prices.
You can add fixed charges to the following:
- Per person.
- Per person per day.
- Per accommodation.
- Per accommodation per day.
- Per reservation.
Fixed charges usually include:
- Cleaning fee.
- < span style=”font-weight: 400;”>Service cost.
- Taxes.
- Tourist taxes.
- Extra service taxes.
Set the charges
Step 9: Add a Payment Method.
Choose Dashboard -> Accommodation-> Settings and then locate and select the option Payment Gateways.
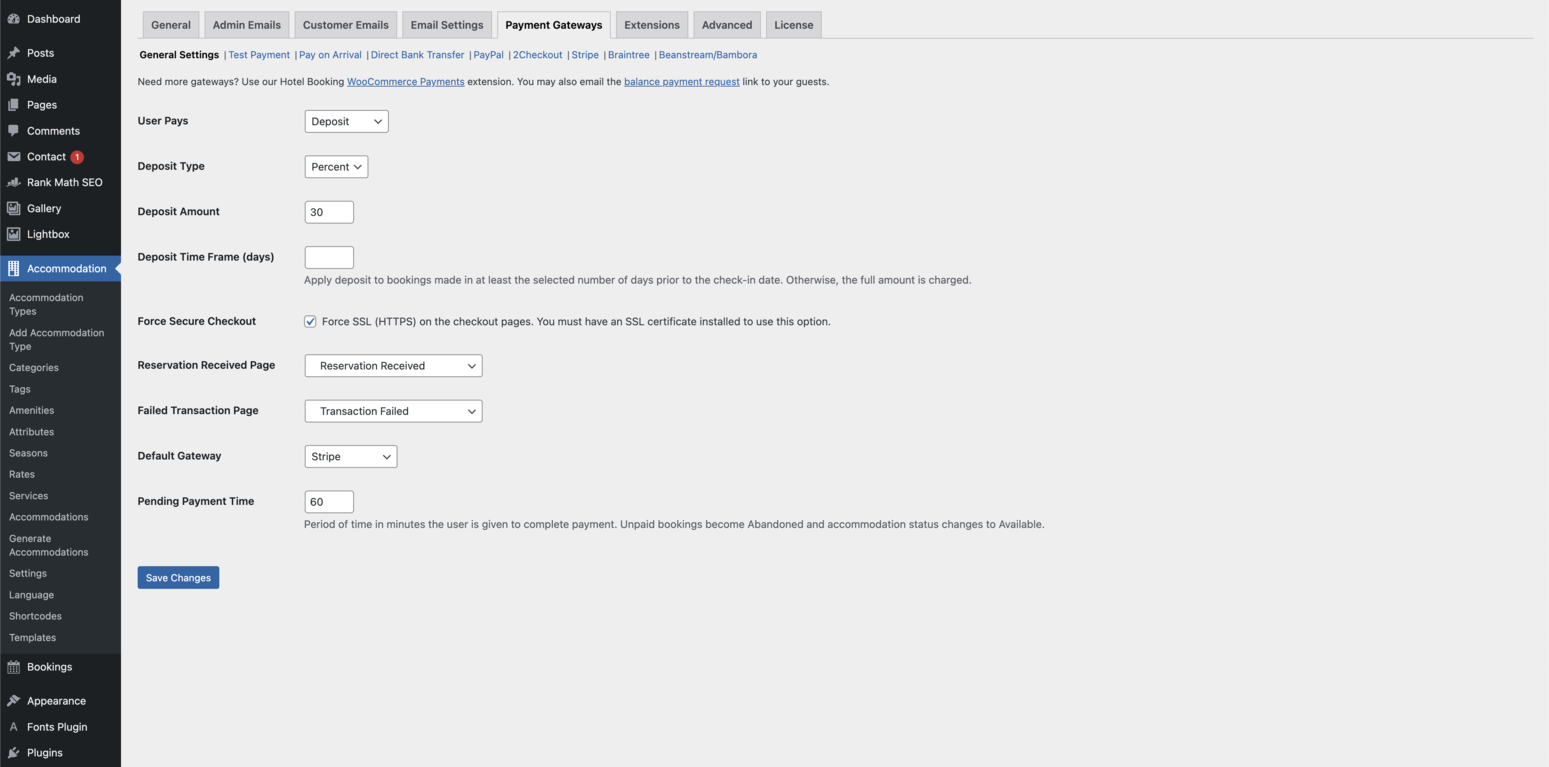
Options include:
- Your customers can choose from different payment options.
- Whether they need to pay a deposit or the full amount before their arrival.
How will you accept payments?
In our case, through Stripe. All you need to add is the ‘Live Secret Key‘ and ‘Live Publishable Key‘.
*If, despite our guide, you want a professional who knows the short-term rental market well to build your website, learn more below.
Step 10: Add Content to Your Website.
For marketing, content is king. In the world of property rentals, content is essential for your visitors. Creating a content marketing strategy for your website will increase visibility, build your brand, and help guests establish a connection with you and your property before even setting foot there.
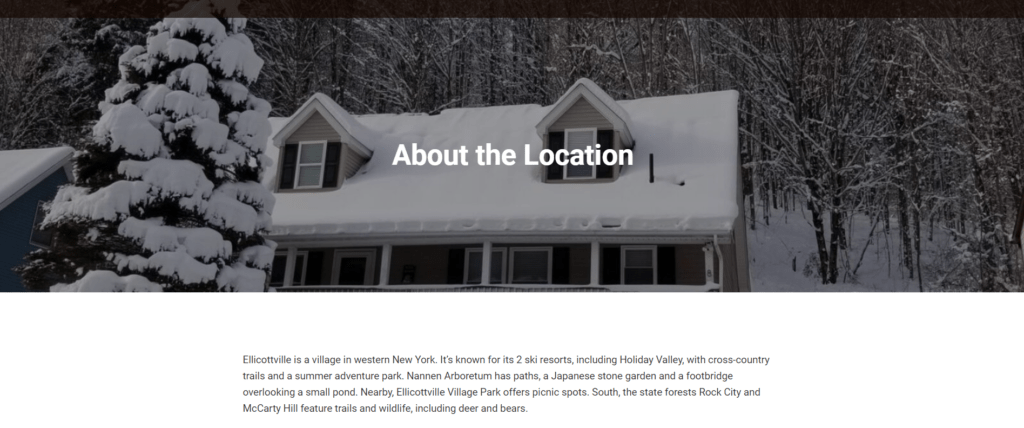
There are many content options to choose from, but the most crucial is content related to your area. Go to the Dashboard, click on Pages, and Add new. There, you can set up a whole page to provide potential visitors with all the information they need about your location.
Here’s an example:
It will end up looking something like this:
Some tips and tricks for creating content include:
- Fun events related to your area.
- Hidden treasure guide.
- Tips and tricks for first-time visitors to the location.
- Keep it original, unique, and personal!
Perhaps you find the above process time-consuming? Our experts can quickly set up your website, customized to your property and needs!
Step 11: Set up synchronization with Hosthub to avoid double bookings.
Double bookings are a host’s worst nightmare. Once you list your property on multiple channels, you risk receiving overlapping reservations, which can cost you a lot of money.
In general, canceled bookings not only make you feel bad, but you also have to deal with host cancellation charges, low ratings, bad reviews, and lost money.
However, there is a straightforward way to avoid this. Enter Hosthub. With the Zero Double Booking Guarantee:
- We contact your guests
- Find alternative accommodation of equal or greater value
- Cover all expenses of the change (up to $500), and finally
- Communicate with the channels and confirm that there will be absolutely no impact on your profile since we take responsibility!
Additionally, we synchronize all your bookings, so you don’t have to check them manually. Our platform automates the entire process and synchronizes all your calendar data.
The only thing you need to do is:
- Create an account on Hosthub.
- Add 2 or more accommodations to your account.
Step 12: Add reviews to your website
Most travelers check reviews before making a reservation. If you have a collection of real guest reviews from other channels like Airbnb, it’s best to add them as testimonials.
- Make sure they are updated regularly.
- Ensure you have the most recent reviews there.
You can add testimonials by going to the Dashboard, then Testimonials, and then Add new. Copy and paste your reviews from other channels onto your website.
Tips and tricks for building your website
Here are some tips you should remember:
Page Load Times
Make sure your pages load as quickly as possible. The slower your website loads, the more bookings you’ll lose. Check your website using the Google Test Page.
Choosing Your Target Audience
Before you start building your website, make sure you’ve tailored your marketing strategy and website based on your target audience.
- First, define exactly who your target audience is.
- This may include families, students, business travelers, solo travelers, or large groups.
- Your target audience depends on the type and location of your property. For example, a penthouse in the city center is more suitable for business travelers than families, while a cottage is more of a romantic retreat or for family vacations.
Choosing Your Photos
Visitors are 20% more likely to book your property if you have many high-quality photos. Your images should be:
- Bright
- Clear
- Show the emotions and thoughts your visitors will have when they are at your accommodation
- Professional – it’s better to hire a professional to take some photos.
Make sure you’ve posted your photos to have a logical sequence and order. Start the journey right from the door through the house and then explore each room separately.
Tips for Crafting the Perfect Attractive Title:
- Make sure you mention the type of your listing. (Is it a villa? Penthouse? Cottage? House?)
- Do you have a special amenity you can highlight? (Hot tub, trampoline, shelter, pool?) If yes, mention it.
- Mention the type of traveler you want to target: “Cottage ideal for a couple.”
- Mention any significant nearby attractions. “10 minutes away from Times Square.”
Writing Your Description
There’s no secret recipe to write the perfect description; you have to play to your strengths and truly make your guests admire your property. It sounds easier than it is.
Some of our tips include:
- Use top keywords for SEO purposes.
- Have a unique and fun tone to create as much personal connection as possible.
- Start with an enticing sentence to help visitors keep reading.
- Use bullet points and concise sentences.
- Make visitors envision their vacations through your description.
Add a “Where to Go and What to Do” Section
Share your experience with your guests and add some local recommendations for nearby amenities. These include:
- Supermarkets.
- Restaurants.
- Shopping.
- Nightlife.
- Any nearby activities.
- Metro stations.
Add a Hidden Treasures Guide
Add value to your property and your website by creating a Hidden Treasures Guide. Instead of writing “Top 10 things to do in X,” provide visitors with information about your area. This could include:
- Amazing landmarks.
- Independent restaurants, galleries, museums, and bars.
- Locals’ favorite spots.
- Events not known to tourists.
- Budget-friendly locations away from tourist areas.
This will make visitors feel confident about booking and likely follow your suggestions. It also works the other way: if visitors are looking for things to do in your area, they may stumble upon your website and book your property from there.
Add precise directions.
Your guests want to know exactly how far your location is from top landmarks. You can even add an interactive map to visually help your guests understand how far/close you are.
Be first in searches
How great would it be for your website to rank among the first results travelers see? Very!
- Find the right keywords related to your area.
- Optimize your images (smaller sizes, use file names, use keyword-rich descriptions).
- Use the right page titles.
- Promote your links.
- Start a short-term rental blog, use keywords, and develop excellent content.
Avoid these mistakes
- Have a poor description.
- Post small/low-quality photos.
- Lack location information.
- Lack an “About Us” section.
- Create a website with mismatched colors.
- Lack a call to action on your website.
- Fail to mention secure online payments.
- Not optimizing the website for mobile phones.
Some tips for the end
As we’ve seen, creating a website nowadays has never been easier. It’s crucial for you as a property owner to have your own website and advertise it everywhere. It’s the perfect way to build your brand, showcase what your property has to offer, attract consistent new potential customers, and maximize your earnings. The platforms we shared in this guide help you save money, time, and build your website easily and quickly.
*If, despite our guide, you want a professional who knows the short-term rental market to build your website, learn more below.